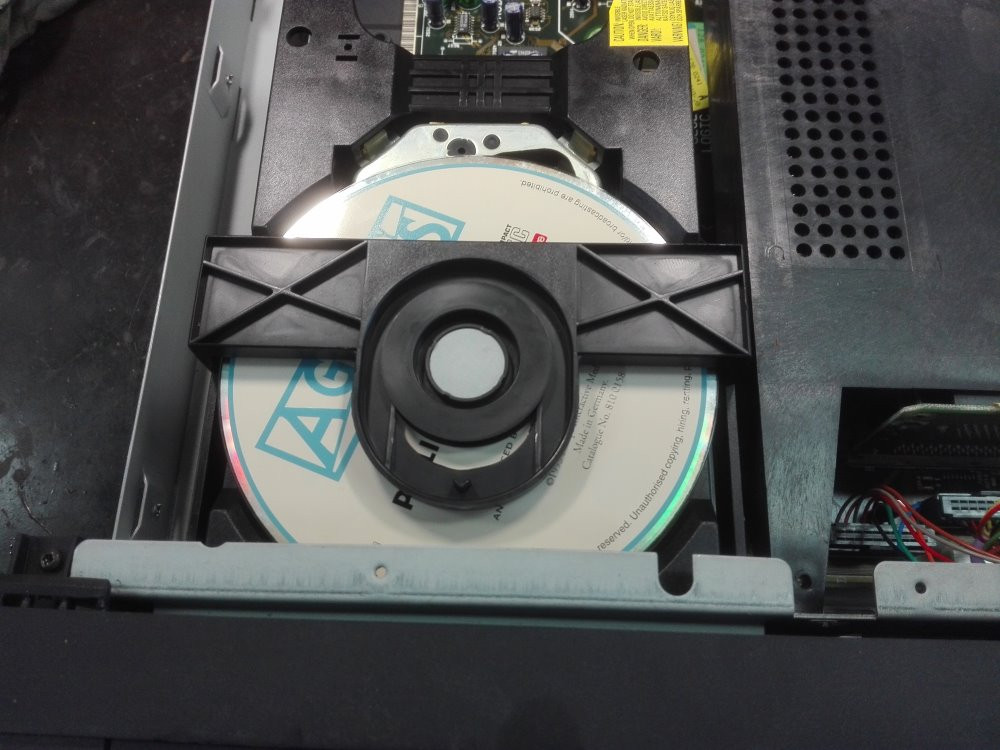
“ERR” on player display

Don’t panic! it can be easier than you think to solve!
Symptoms:
When you insert a disc, it can be a CD-i title, Video-CD, Audio-CD or any other compatible disc, “ERR” appears and the “Play CD-i” icon don’t show up.
But the player isn’t frozen, you still can move the cursor and access the options.
Causes:
“ERR” message can be shown on the CD-i player display for many reasons.
1st – CD-R quality.
A bad CD-R quality disc used to burn your ISO’s (images), or a to fast burning speed.
Only use CD-R, no CD+R! This last one isn’t readable with all players.
Burn your CD-R at the lowest speed as possible, the best is x4 (yes… this is very slow).
Remember the CD-i disc drive is just x1 speed reading, so it is very sensitive to bad burning.
The best CD-i player model to read ISO’s is model 220.
2nd – Bad position of the disc.
If you are using a good quality CD-R and burning at a low speed or even using an original CD-i disc, then is can be the position of the disc on the tray.
To solve this problem you just need to press twice on OPEN button (on the screen or on the front panel) .
This will quickly open and close the CD tray and change the position of the disc.
Do that 2 or 3 times until “PLAY CD-i” appears.
3rd – The disc not spinning.
When the disc is inside you can’t hear any spinning noise?
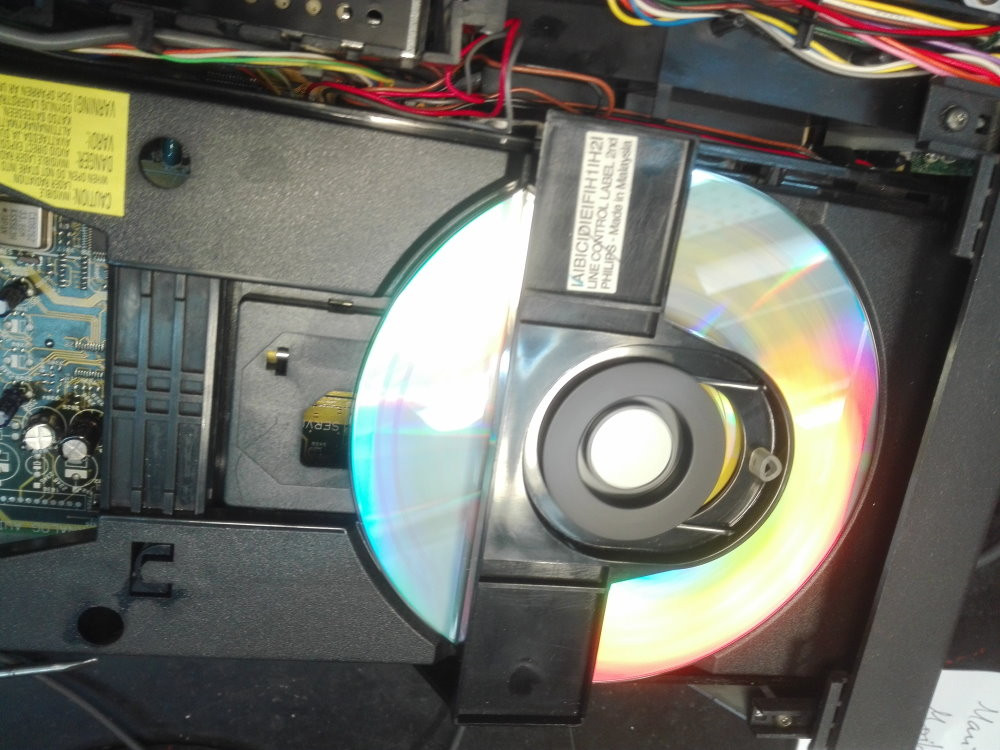
To define if the disc is really spinning, you will have to open the top case of the player.
In this case there is 2 possibilities:
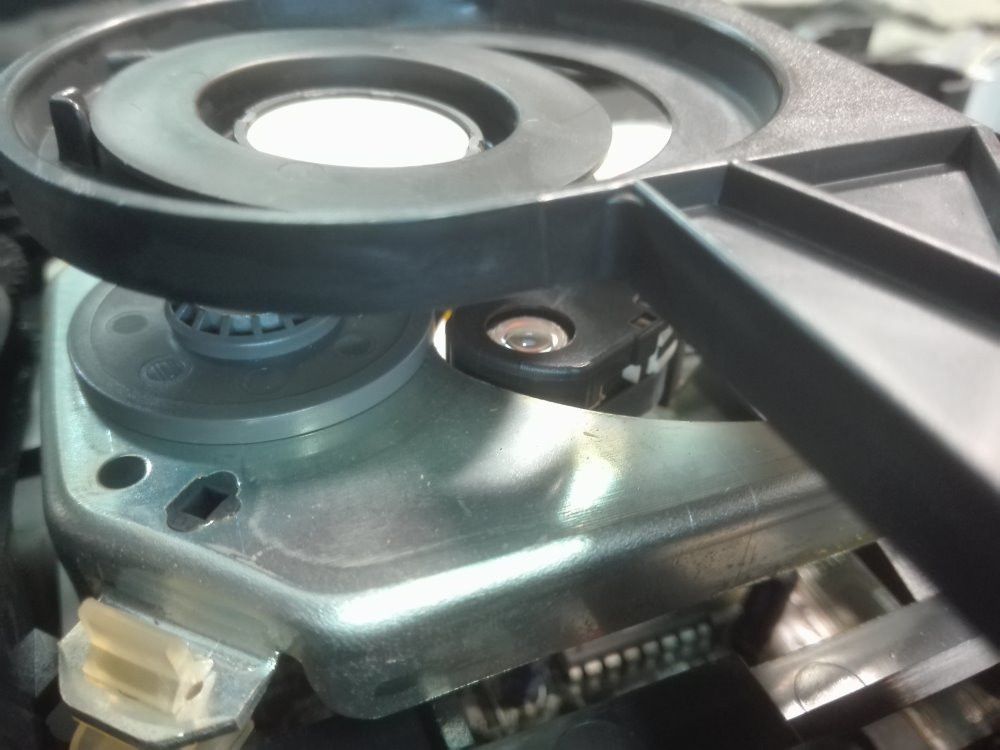
– A stuck disc older.
– A motor problem.
4th – Timekeeper problem.
The possibility of the problem being due to a dead Timekeeper is very low or even not existing.
A dead Timekeeper can cause many problems to a CD-i player, but this “ERR” message isn’t one of them.
I repaired many CD-i players and I can confirm the problem exist BEFORE and AFTER a Timekeeper changing.
A good working Timekeeper is always wanted to keep your CD-i player in good conditions, so change it anyway! But this error isn’t related with it. Any other consoles brands works even with a dead memory battery.
You defined your problem as the 3rd possibility?
Well, join me and let’s solve the problem!
What will you need?
– Torx T8 screwdriver
– Fine screwdriver
In this tutorial, I will use a CD-i 210/20 and CD-i 470/20 models (both repaired with the same problem).
1. Open the top case
– Turn OFF your CD-i plater.
– Unplug the power cord.
– Use a Torx T8 screwdriver to unscrew 7 screws in total (3 in the back and 2 in each laterals).
2. Confirm if a CD-i disc spins
– Plugin the power cord.
– Power ON your player.
– Insert a CD-i disc.
If the disc stays still, it means no spinning (I know, you are not so dumb!).
3. Check the rotation disc older
– Remove the Disc.
– Turn OFF your player.
– Unplug the power cord.
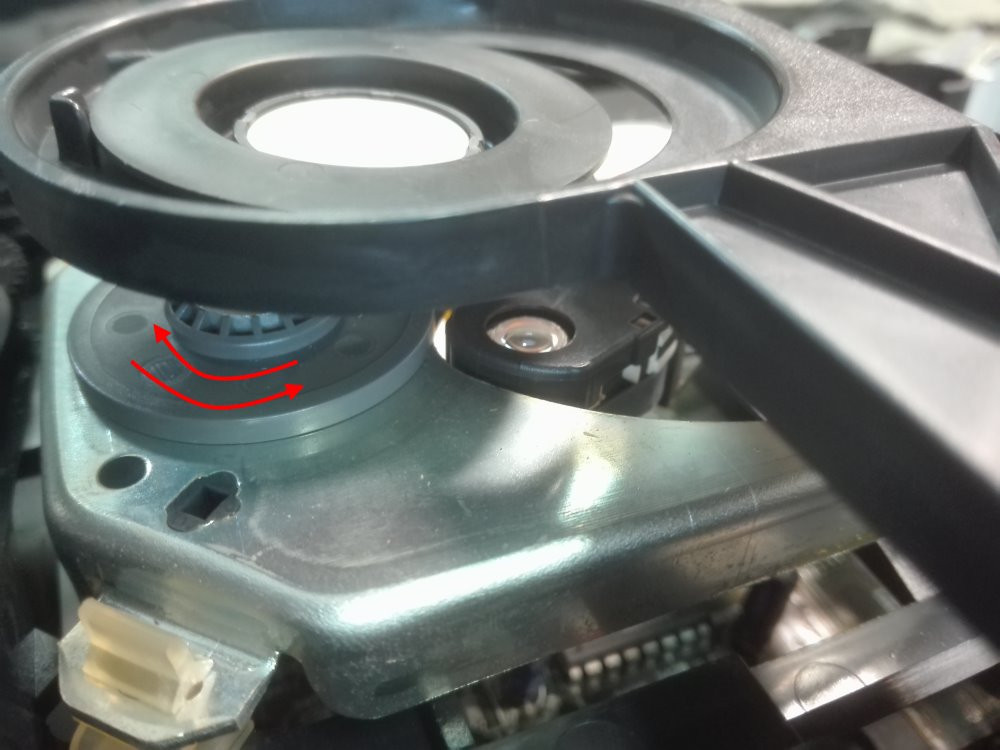
Look closely at the disc older and using your fingers, see if it turns manually or if its looks like stuck (heavy).
WARNING, do not touch the laser lens!
For more clean as your fingers are, they will always put natural fat. This may affect future lens reading.
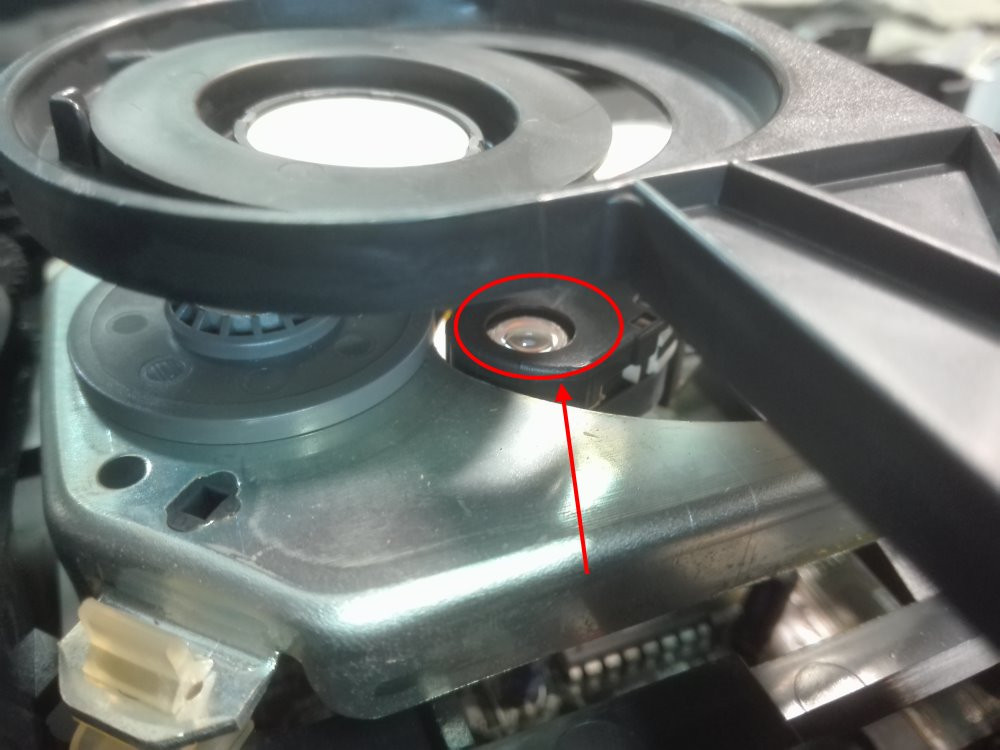
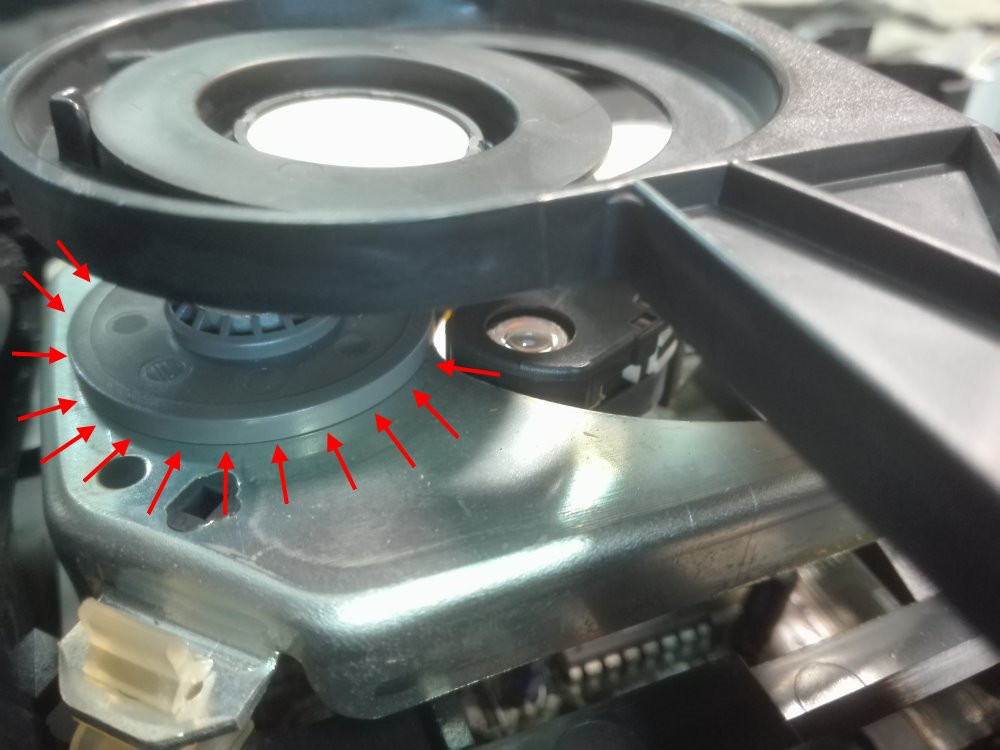
– Using a fin screwdriver, gently place it between the metal piece and the disc older.
– Doing vertical movements all around the disc older, make it unstick and stop when you will get 1 mm (1 millimetre) of space between the 2 parts.
– Using your fingers, verify if it is now freely rotating.
5. Try if it’s ok
– Plugin the power cord.
– Turn ON your player.
– Insert a CD-i disc.
– See if the disc spins!
6. Play CD-i!
It turns? Great job!
Enjoy again your favourite titles!
– Close everything.
STILL NOTHING SPINNING?
The problem can be the spindle motor. To check it and test it you will need to remove the front panel and the complet CD tray. This part is for more skilled persons. If you are afraid to do it, just don’t do.
7. Remove the CD tray
– Remove the Disc.
– Turn OFF your player.
– Unplug the power cord.
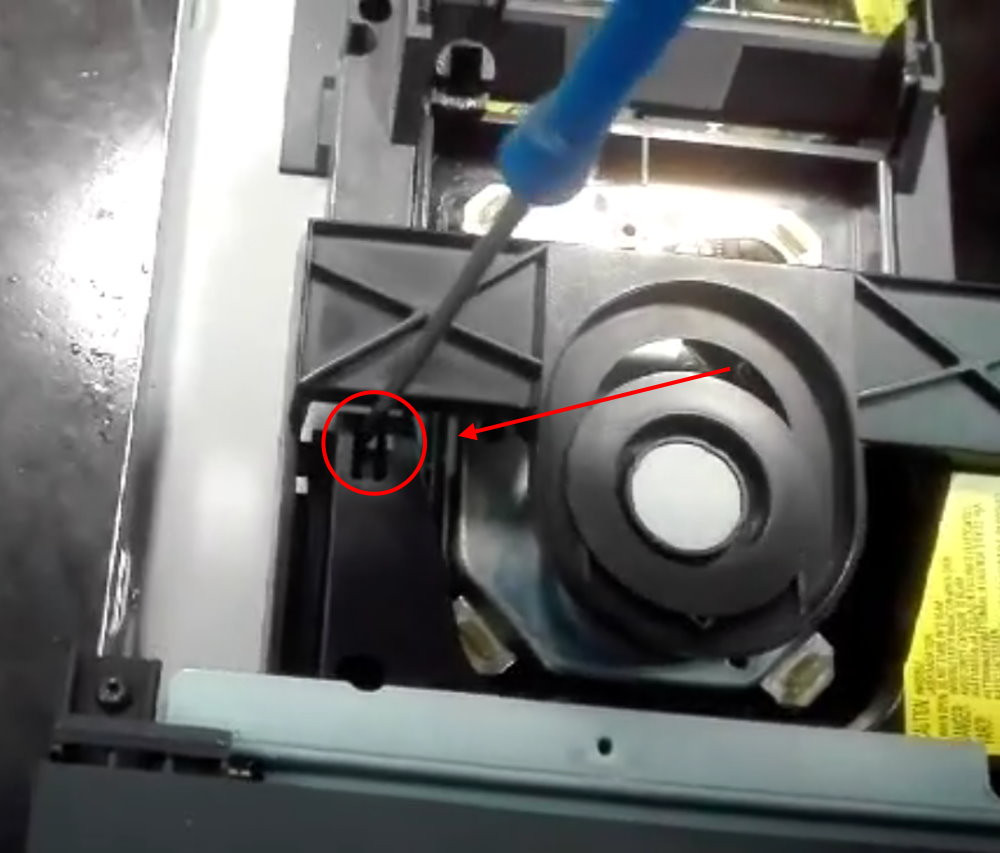
– Open manually the CD tray to the maximum.
– Using a fin screwdriver unlock the lock as shown in the picture.
You can now remove the CD tray from the front side.
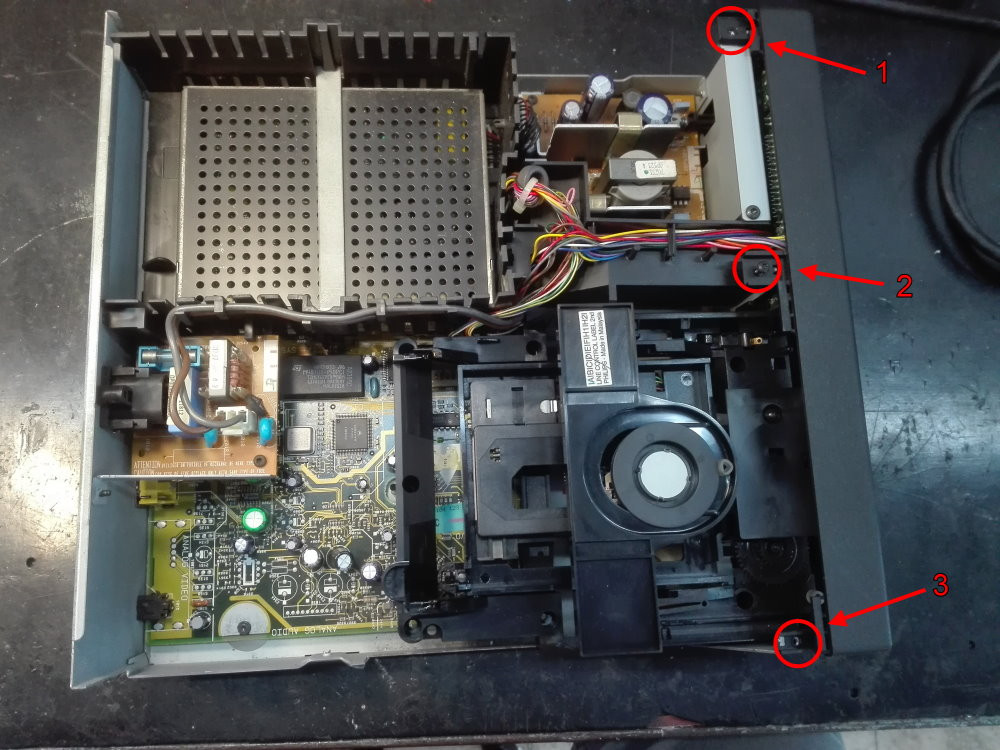
8. Remove the front panel
– Unscrewthe 3 Torx screws
– Remove the front panel.
It is possible that you need to unplug the wires. I didn’t.
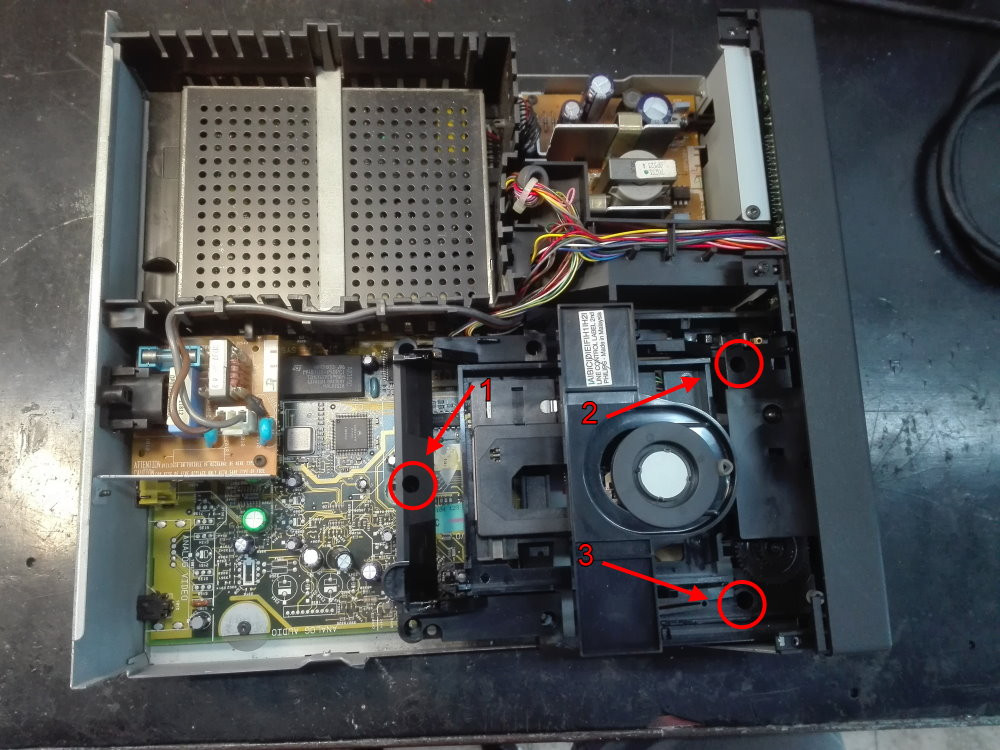
9. Remove the CD Tray kit
– Unscrew the 3 torx screws.
– Remove gently the tray kit.
If you are able to do that it will define if the motor is dead or not.
– Unsolder the motor from the mother board.
10. Check the spindle motor connection
Check the wires soldered on the motherboard.
There is 2 motors (except for the 450 model), a small one for the opening tray and a bigger one for the spinning disc.
You aim to the bigger one.
11. Measure with a multimeter
– Unsolder the wires.
– Measure the continuity of the motor in Ohms.
As measuring and turning manually the motor, you should get a variation on your multimeter.
12. Use an external power supply
– Using an adjustable Continued Courant (CC) from an external power supply (12V or 24V). Input 1.5V to the red and black wires (red is positive and black is negative).
1.5V is enough to verify if the motor spins.
The voltage of a working motor is 5.6V (CC)
13. Nothing happens
– Then you need to get a new spindle motor or a complete disc tray kit.
This is harder to get but not impossible. Some Philips audio CD may be compatible, but I never tried.
Let me remind that we can repair your CD-i players and accessories!
Just contact us to know how!
Good luck and never lose hope!
Comment your impressions and your work!
Omegalfa May 2019

